The Best Organic Mulch for Tomato Plants: A Complete US Grower’s Guide
By Gen Lawn Garden Team | Updated 2025
Why do some tomato plants thrive all summer while others wilt, crack, and rot by July?
You water them. You fertilize them. You stake them. But something is still off — and you can’t figure out what.
Here’s the thing: the answer is almost always under the plant, not on it. A simple 2–4 inch layer of organic mulch around your tomato plants can cut your watering time in half, shut out weeds without chemicals, stabilize the soil temperature, and feed your plants slowly all season long.
In this guide, you’ll discover the 7 best types of organic mulch for tomato plants, exactly how to apply them the right way, and the common mistakes that quietly sabotage even healthy gardens.
Let’s dig in.
Why Organic Mulch for Tomato Plants Is Worth Every Penny
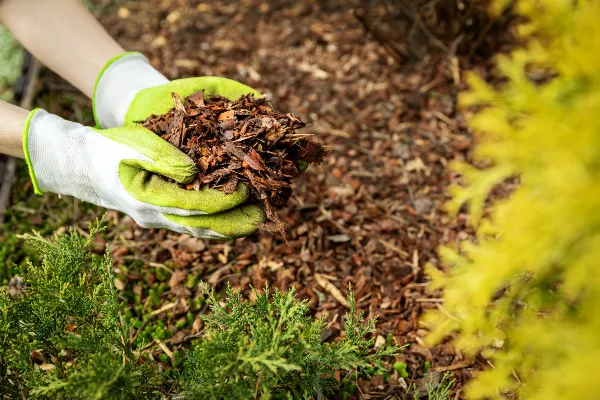
Before you pick a mulch type, it’s worth understanding what organic mulch actually does for your tomatoes — because once you see the full picture, skipping it will feel like leaving money on the table.
It Slashes Your Watering Time by Up to 50%
Tomatoes are thirsty plants. Without mulch, the sun bakes the topsoil dry within hours of watering — especially during US summer heat waves. Organic mulch acts as a protective blanket, reducing soil moisture evaporation by up to 50–60%, depending on depth and material. That means fewer trips to the hose, more consistent moisture for your roots, and far less fruit cracking from uneven watering.
It Keeps Soil Temperature Stable
Tomato roots don’t like surprises. Wild swings from hot afternoons to cool nights stress the plant and slow growth. A proper mulch layer acts as insulation — keeping the soil cool during scorching days and warm on chilly nights. This is especially useful in northern US states where late-spring cold snaps can catch transplants off guard.
It Naturally Suppresses Weeds Without Chemicals
A 3–4 inch mulch layer blocks sunlight from reaching weed seeds in the soil. No sunlight, no germination. For gardeners who want a cleaner, chemical-free garden, this is one of the biggest wins organic mulch delivers. Any weeds that do manage to sneak through are far easier to pull since the soil beneath stays loose and moist.
It Slowly Feeds Your Plants All Season
Here’s what makes organic mulch truly special compared to plastic alternatives: it breaks down over time. As materials like straw, shredded leaves, or compost decompose, they release nutrients into the soil and feed the billions of microorganisms that improve soil health. Tomatoes are heavy feeders, so this slow, steady nutrient release is a genuine bonus — not a nice-to-have.
It Protects Fruit and Prevents Disease
Low-growing tomatoes left sitting on bare, wet soil are a recipe for rot. Mulch creates a physical barrier between the fruit and the ground — and between the soil and the plant’s lower leaves — reducing the splash-back of soil-borne diseases like early blight and septoria leaf spot.
The 7 Best Types of Organic Mulch for Tomato Plants
Not all organic mulches are created equal. Here’s a breakdown of every major option — what it does well, what to watch out for, and who it’s best for.
1. Straw Mulch — The #1 Choice for US Gardeners
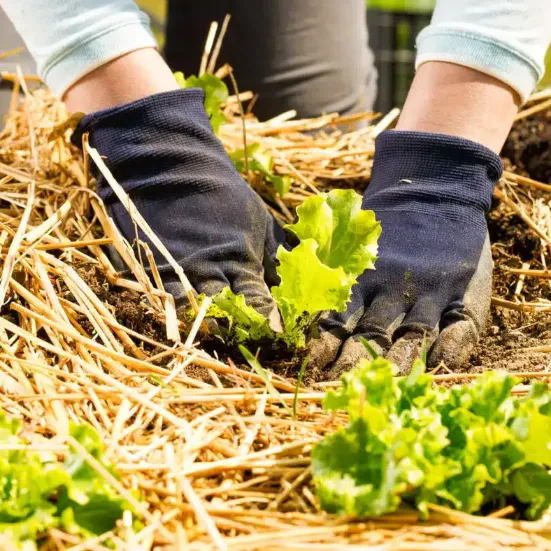
Straw is the most popular organic mulch for tomato plants across the US, and for good reason. It’s lightweight, widely available at garden centers and farm supply stores, and does an excellent job retaining moisture and suppressing weeds. It also breaks down slowly enough to last most of the growing season without constant topping off.
 Critical Rule: Straw ≠ Hay
This is the single most common — and most costly — mistake tomato gardeners make. Straw is the dry stem of harvested grain crops like wheat or rice, with most seeds removed. Hay is dried grass cut for livestock feed, and it is packed with weed seeds. Spread hay around your tomatoes and you’ll be pulling weeds all summer. Always verify you’re buying straw — specifically wheat straw or rice straw — from a reputable source, and ask whether any herbicides were used on the field.
- Best depth: 3–4 inches
- Best for: Large tomato beds, budget-conscious gardeners
- Pro tip: Apply straw loosely — packed-down straw can mat and repel water
2. Shredded Leaves — Free, Abundant, and Soil-Building
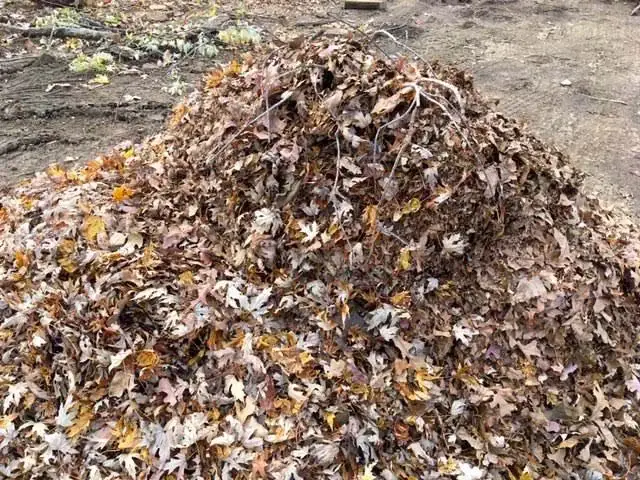
If you rake leaves in fall, you already have one of the best mulches available — completely free. Shredded leaves protect moisture, improve soil structure, and attract earthworms that aerate the soil as they move through it.
The word shredded is the key here. Whole, unshredded leaves will mat together into a dense layer that blocks water and air from reaching your roots — which is the opposite of what you want. Run them over with your mower a couple of times, or invest in a leaf shredder to break them into small pieces before applying.
- Best depth: 2–3 inches
- Best for: Fall-abundant gardens, gardeners building long-term soil health
- Avoid: Using wet, freshly fallen leaves that haven’t dried — they pack down too easily
3. Compost — The Dual-Purpose Mulch and Fertilizer
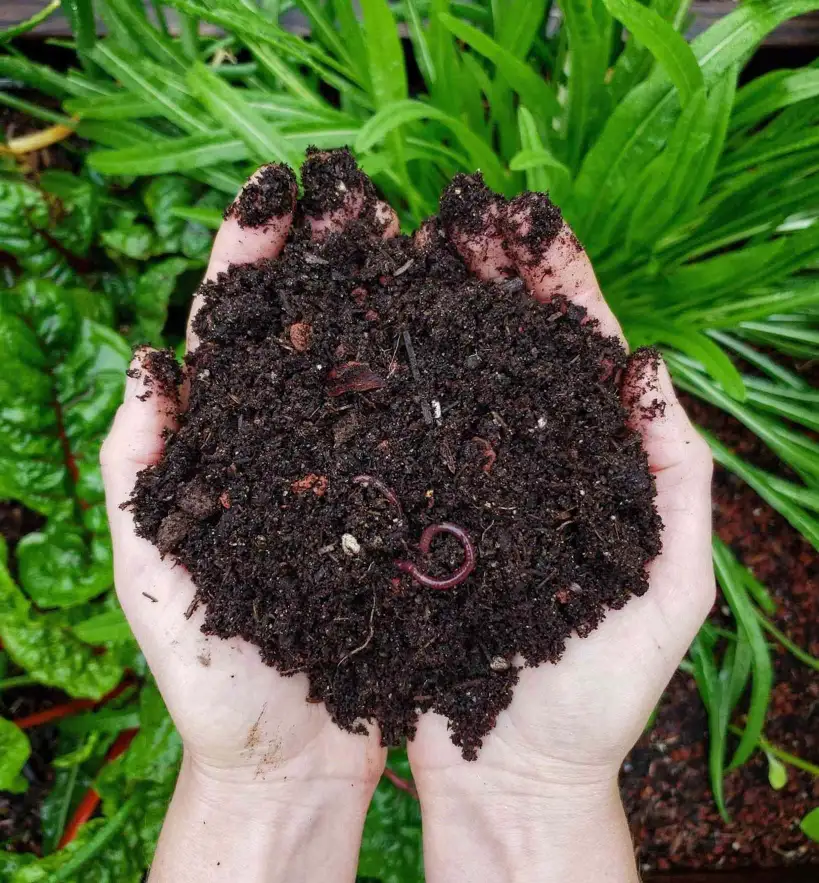
Compost is the gardener’s gold standard. As a mulch, it ticks every box: moisture retention, weed suppression, temperature regulation. But its real superpower is that it simultaneously feeds your tomatoes with a steady release of nutrients as it breaks down.
You can use homemade compost from a backyard bin, or pick up bagged compost from a garden center. If you go the store-bought route, look for options that contain diverse organic matter — not just cattle manure, which can be high in nitrogen. Too much nitrogen pushes tomato plants to grow lots of leafy foliage but fewer blossoms and less fruit.
Make sure your compost is fully decomposed before using it as mulch. Fresh, unfinished compost can introduce pathogens and may burn roots.
- Best depth: 2–3 inches
- Best for: Gardeners who want to mulch and fertilize in one step
- Pro tip: Layer compost underneath straw for maximum benefit
4. Mushroom Compost — The Underrated Option for Acidic Soils
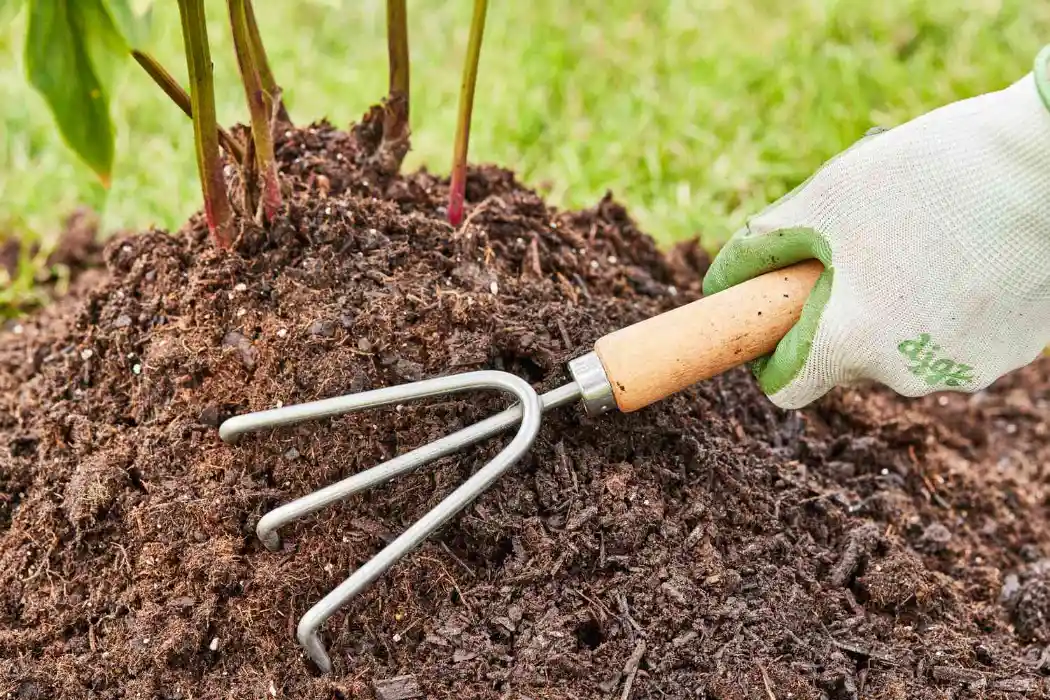
Mushroom compost is a byproduct of commercial mushroom farming — and it’s one of the most underused mulches in US home gardens. It’s packed with nutrients, has excellent water retention, and breaks down into rich organic matter over the season.
Here’s what makes it unique: mushroom compost is slightly alkaline, which makes it ideal for balancing overly acidic soil. If you’ve tested your garden soil and found it running too low on the pH scale (below 6.0), mushroom compost can help bring it into the ideal tomato range of 6.0–6.8. You can find it at most garden centers or landscape supply yards.
- Best depth: 2 inches
- Best for: Acidic soils, nutrient-depleted beds
- Avoid: Using it if your soil pH is already 7.0 or above
5. Grass Clippings — Free but Requires Careful Handling
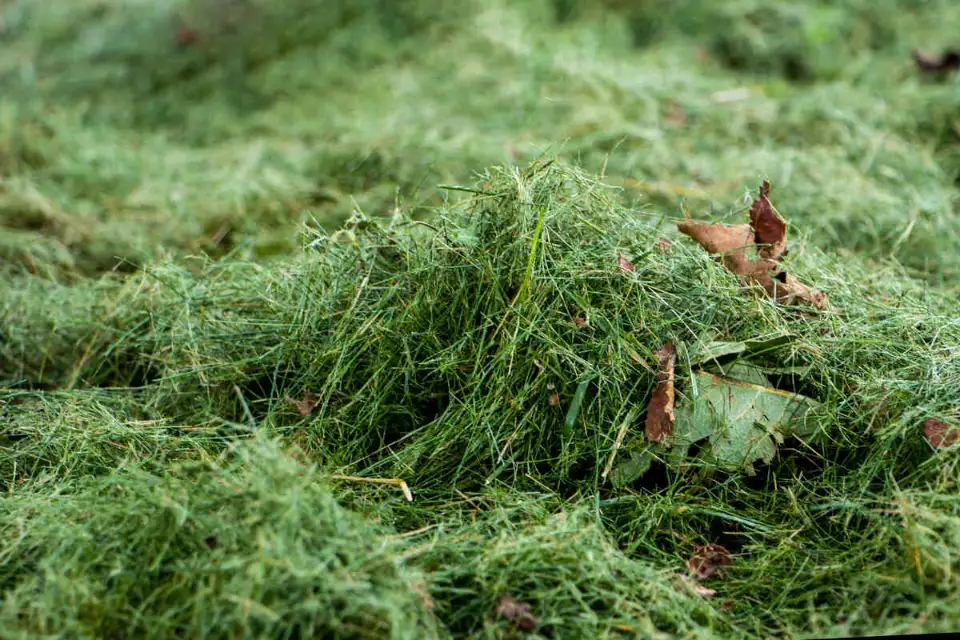
If your lawn produces clippings after every mow, you have a ready supply of nitrogen-rich mulch waiting for you. Grass clippings break down quickly, improving soil fertility — but they come with a few rules that make them trickier to use than straw or leaves.
The biggest risk is matting. Thick, wet grass clippings pack together into a dense, slimy layer that blocks water and air from penetrating the soil. Apply them in thin layers (no more than 1–2 inches) and let each layer dry before adding more.
More importantly: never use clippings from a lawn treated with broadleaf herbicides. According to Iowa State University Extension, you should wait until the lawn has been mowed at least 2–3 times after any herbicide application before collecting clippings for garden use. Herbicide residue in the clippings can seriously damage or kill tomato plants.
- Best depth: 1–2 inches, applied in thin layers
- Best for: Gardeners with untreated, organic lawns
- Avoid: Freshly cut thick clippings applied in one deep layer
6. Wood Chips and Bark Mulch — Long-Lasting but Watch the Nitrogen
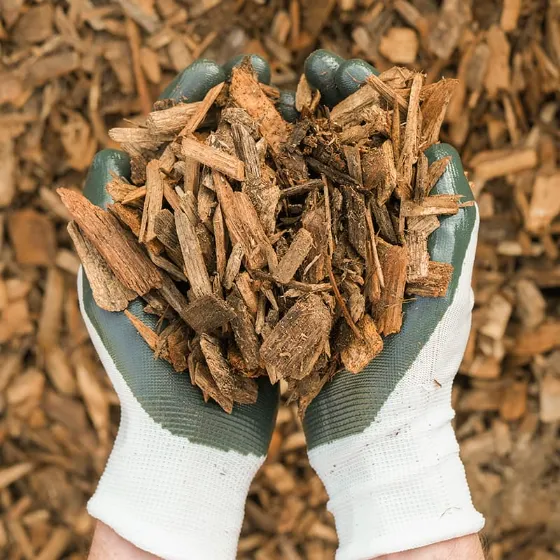
Wood chips and bark mulch are durable, attractive options that can last an entire growing season and beyond. They’re excellent for pathways between tomato rows and for raised garden beds where aesthetics matter.
The catch: woody materials require nitrogen to break down, and if applied incorrectly, they can temporarily pull nitrogen from your soil in a process called nitrogen drawdown — leaving your tomatoes starved just when they need it most. To prevent this, mix in a light application of organic nitrogen fertilizer (such as blood meal or feather meal) into the soil before layering wood chips on top.
You can often get free wood chips from local arborists, who are frequently happy to offload a truckload.
- Best depth: 2–3 inches
- Best for: Paths between rows, raised beds, long-term coverage
- Pro tip: Ask your local arborist for free chips — it’s a common practice
7. Newspaper and Cardboard — The Ultimate Weed Barrier Base Layer
Newspaper and cardboard aren’t mulches in the traditional sense — but as a base layer under straw, wood chips, or shredded leaves, they’re incredibly effective at blocking weeds. Both break down over the season, adding organic matter to the soil in the process.
Lay sheets of newspaper (4–8 layers thick) or flattened cardboard boxes directly on the soil around your plants, overlapping the edges by a few inches. Wet them down thoroughly so they don’t blow away, then cover with your chosen organic mulch on top. This combination is used in no-dig gardening and permaculture methods and is one of the most effective low-cost weed suppression strategies available.
- Best for: Serious weed problems, budget gardeners, no-dig setups
- Avoid: Glossy magazine pages or colored ink paper — stick to plain newsprint and plain cardboard
How to Apply Organic Mulch Around Tomato Plants the Right Way
Choosing the right mulch is only half the job. Applying it incorrectly can cancel out all the benefits — or worse, actively harm your plants. Here’s the step-by-step process.
Step 1 — Wait for the Right Time: 60°F Soil + 6–8 Inch Plant Height
This is the step most gardeners skip — and it costs them.
Mulching too early in the season can trap cold in the soil, slowing root development at a critical time. Wait until your soil temperature has reached at least 60°F (you can check this with an inexpensive soil thermometer) and your tomato transplants are at least 6–8 inches tall.
In most US regions, this means mulching in late May to early June for spring gardens.
Step 2 — Prepare the Soil First
Before laying mulch, give your plants a deep watering and remove any existing weeds. This ensures the soil is moist and weed-free before you lock in that moisture with your mulch layer. Optionally, add a light application of balanced organic fertilizer at this stage.
Step 3 — Apply 2–4 Inches Deep
The sweet spot for organic mulch depth is 2–4 inches. This is deep enough to:
- Suppress weed seeds from germinating
- Retain adequate soil moisture
- Regulate soil temperature
Going deeper than 4 inches can reduce airflow to the soil and potentially invite fungal problems. For lighter materials like straw, you can go up to 4 inches comfortably. For denser materials like compost or mushroom compost, 2–3 inches is plenty.
Step 4 — The 2-Inch Stem Rule (Non-Negotiable)
Always leave a 2-inch gap between the mulch and the tomato stem. This is the most important application rule.
Mulch piled against the stem traps moisture against the plant’s base — the ideal environment for stem rot, crown rot, and early blight. Pull the mulch back slightly from the base of each plant and keep that clear zone all season.
Step 5 — Refresh Mid-Season Every 6–8 Weeks
Organic mulch breaks down over time — especially in warm, rainy US summers. Check your mulch depth every 6–8 weeks and top it off as needed to maintain that 2–4 inch layer. After heavy rain, the mulch may compact or thin out faster than expected. A mid-season refresh also helps knock back any new weed growth that has found its way through.
Organic Mulch vs. Plastic Mulch for Tomatoes: Which Is Better?
You’ve probably seen black or red plastic sheeting used in commercial tomato operations. Is it worth considering for your home garden? Here’s an honest comparison:
| Feature | Organic Mulch | Black Plastic | Red Plastic |
|---|---|---|---|
| Soil enrichment over time | Yes — feeds soil as it breaks down | No | No |
| Moisture retention | Excellent | Good | Good |
| Weed suppression | Effective | Very effective | Effective |
| Soil temperature regulation | Cools AND warms depending on season | Warms soil (good for early season) | Warms soil + reflects light to fruit |
| Cost | Low to free | Low | Moderate |
| Environmental impact | Breaks down naturally | Plastic waste | Plastic waste |
| Best climate for US gardens | All regions | Northern states (short seasons) | Warm climates, commercial farms |
The verdict: For most US home gardeners, organic mulch is the clear winner for long-term soil and plant health. Black plastic can be useful in northern states like Minnesota, Wisconsin, or Maine where the growing season is short and you need to warm soil fast. Red plastic mulch has been shown to slightly increase tomato yields in some studies, but the benefit rarely justifies the cost and waste for backyard growers.
Mulching Mistakes That Quietly Kill Tomato Plants
Here’s something most gardening guides won’t tell you: bad mulching is often worse than no mulching. These are the five most common mistakes — and exactly how to avoid them.
Mistake 1 — Using Hay Instead of Straw
Already covered above, but worth repeating: hay is full of weed seeds. One bale of hay spread around your tomatoes can introduce hundreds of weed seeds that will germinate all season. Always buy straw and verify the source.
Mistake 2 — Mulching Before the Soil Warms Up
Laying mulch in early spring before the soil has reached 60°F locks cold into the ground. Tomato roots need warmth to grow and absorb nutrients. Mulching too early stunts early growth just when your transplants are trying to establish. Be patient — wait for the right temperature.
Mistake 3 — Piling Mulch Against the Stem
Volcano mulching (the name for mulch piled high against a plant’s stem like a volcano) is one of the leading causes of preventable tomato disease in US gardens. Keep that 2-inch clear zone around every stem, every time.
Mistake 4 — Using Thick Layers of Fresh Grass Clippings
A thick mat of wet grass clippings becomes a slimy, airless barrier that suffocates soil organisms, blocks water penetration, and can start to heat up as it ferments. Always apply grass clippings in thin layers and let them dry between applications.
Mistake 5 — Skipping Nitrogen Supplementation with Wood Chips
Wood chips are great — but if you apply them without compensating for nitrogen drawdown, your tomato plants may start showing yellowing leaves mid-season as the soil microbes consume available nitrogen to break down the wood. Add a nitrogen-rich organic fertilizer like blood meal or feather meal to the soil before applying wood chip mulch.
Frequently Asked Questions About Organic Mulch for Tomato Plants
What is the best organic mulch for tomato plants?
Straw is generally considered the best all-around organic mulch for tomatoes in the US — it’s affordable, widely available, easy to apply, and does an excellent job retaining moisture and suppressing weeds. For gardeners who also want to feed their soil, pairing a 1-inch base of compost with a 2–3 inch layer of straw on top gives you the best of both worlds. Always use straw, not hay, to avoid introducing weed seeds.
When should I put organic mulch around tomato plants?
Wait until your soil temperature reaches at least 60°F and your transplants are 6–8 inches tall — typically late May to early June in most US states. Mulching too early traps cold in the soil and slows root development. You can use an inexpensive soil thermometer to check before you start.
How deep should organic mulch be around tomato plants?
Apply mulch to a depth of 2–4 inches, keeping a 2-inch gap clear around each plant stem. For lightweight materials like straw, 3–4 inches works well. For denser materials like compost or mushroom compost, 2–3 inches is sufficient. Deeper than 4 inches can restrict airflow and invite fungal issues.
Can I use wood chips as organic mulch for tomatoes?
Yes — but with one important caveat. Wood chips temporarily pull nitrogen from the soil as they break down (a process called nitrogen drawdown). Before applying wood chips, work a nitrogen-rich organic fertilizer into the top layer of soil to compensate. Wood chips are particularly good for pathways between rows and raised beds where long-lasting coverage is a priority.
Does organic mulch attract slugs or pests to tomato plants?
Organic mulch can create habitat for slugs and pill bugs in consistently wet conditions — particularly if mulch is applied too thickly or directly against the stem. To minimize pest risk, maintain the 2-inch stem clearance rule, avoid overwatering, and keep mulch depth to the recommended 2–4 inches. In most US gardens, the pest risk is far outweighed by the moisture and weed control benefits organic mulch provides.
The Bottom Line
Here’s a quick recap of everything you need to walk out to your garden and get it right today:
- Straw is your safest bet — lightweight, affordable, and widely available. Never use hay.
- Layer compost under straw for a moisture + nutrient double punch.
- Wait until soil hits 60°F before mulching — don’t rush it in early spring.
- Apply 2–4 inches deep and always leave a 2-inch gap around each stem.
- Refresh every 6–8 weeks to maintain depth through the summer.
Pick up a bale of straw or a bag of shredded leaves this weekend. Lay it down the right way, and your tomato plants will reward you with better fruit, fewer weeds, and a lot less watering all season long.
Got questions about your specific garden setup? Drop them in the comments below — we’re here to help.
References & Further Reading
- Iowa State University Extension — Mulching Vegetable Gardens
- Penn State Extension — Tomato Diseases
- University of Minnesota Extension — Mulching in the Garden
- University of Maryland Extension — Organic Matter for Vegetable Gardens
- Espoma Organic — Mulch Tomatoes Now
- Gardening Know How — Best Mulch for Tomatoes
- Old Farmer’s Almanac — Growing Tomatoes
About Author
Khalid Fazal is a seasoned lawn care specialist and horticultural researcher with over 15 years of hands-on experience transforming challenging landscapes into lush, resilient green spaces. His journey didn’t start in a lab, but in a backyard full of stubborn, cracked clay that “experts” said would never grow a healthy blade of grass. Refusing to accept a yard full of dust, Khalid spent years experimenting with organic soil restoration and precise mulching—eventually turning that wasteland into a neighborhood showpiece on a shoestring budget.
From mastering core aeration techniques to optimizing soil pH for specialized turf varieties, Khalid’s approach combines old-school grit with modern agronomic science. He founded Gen Lawn to provide homeowners with honest, research-backed advice that prioritizes long-term soil health over quick-fix chemical solutions. When he isn’t analyzing soil profiles, he’s developing precision tools to help others achieve professional results without the professional price tag.

Lawn Winterizer: When to Apply by Grass & Region [2026]
Table of Contents Home / By Khalid Fazal | Updated:...
Read More
Spring Lawn Care: What to Do and When in Every US Region
Table of Contents Home / By Khalid Fazal | Updated:...
Read More
Lawn Maintenance Checklist by Season and Grass Type (2026)
Table of Contents Home / By Khalid Fazal | Updated:...
Read More
Liquid Fertilizer vs Granular Fertilizer: Which Wins?
Table of Contents Home / By Khalid Fazal | Updated:...
Read More