
You spread fresh mulch across your garden beds. You did everything right. And two weeks later — there they are. Weeds.
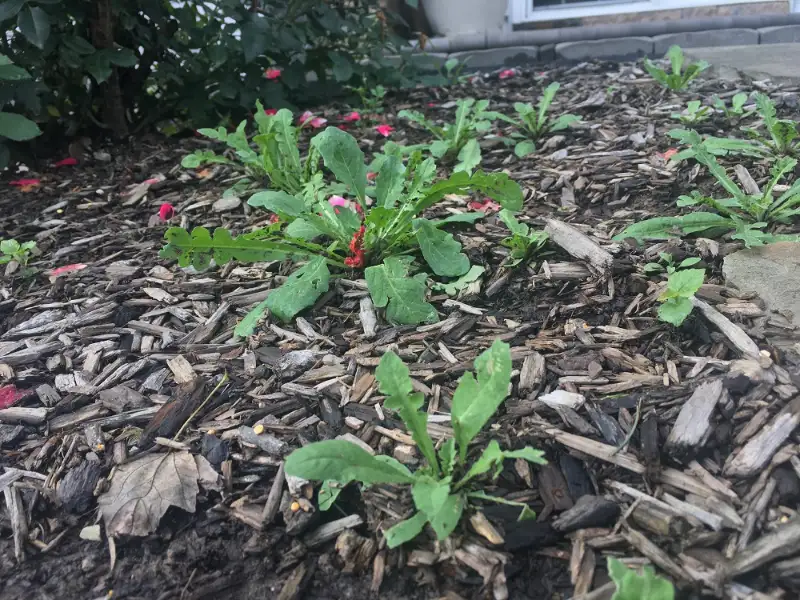
It feels like the mulch betrayed you. But here’s the thing: mulch doesn’t cause weeds. It just can’t stop every single one. Wind carries seeds from neighboring yards. Birds drop them as they fly over. Old mulch breaks down and quietly becomes the perfect seedbed for whatever lands on top.
The good news? You don’t need to spend your whole weekend on your knees. With the right approach, you can clear your mulch beds in an afternoon — and keep them clean for months.
This guide covers exactly how to remove weeds from mulch, what tools you need, when to use weed killer (and when not to), and how to stop them from coming back in the first place.
Why Weeds Still Grow in Mulch — Even When You Did Everything Right
Before you grab your gloves, it helps to know what you’re actually dealing with. Most homeowners assume weeds grow through the mulch from below. That’s only part of the story.
Weed Seeds Travel by Wind, Rain, and Birds
Mulch works by blocking sunlight from reaching the soil. No light, no germination. The problem is, weed seeds don’t need to be under your mulch to sprout — they land on top of it.
According to Skip Richter, a horticulture agent with the Texas A&M AgriLife Extension Service: “Weed seeds need light hitting the soil to germinate. Wherever sunlight hits the soil, nature plants a weed.”
There’s no mulch thick enough to stop a seed from landing on it. But there is a depth that stops it from growing once it lands.
Your Mulch Is Too Thin — or Too Old
Mulch needs to be 2 to 3 inches deep to effectively cut off sunlight from the soil surface. Go thinner than that and enough light seeps through to trigger germination in seeds sitting right on top.
Here’s the part most people don’t realize: organic mulch breaks down over time and blends into the soil. As it decomposes, it creates a nutrient-rich layer — which is exactly the kind of environment weeds love. Old, thin mulch isn’t just ineffective. It’s actively feeding your weed problem.
Annual Weeds vs. Perennial Weeds — Your Removal Strategy Changes
This distinction matters before you start pulling.
Annual weeds — like crabgrass, lamb’s quarter, and hairy bittercress — spread by seed and have shallow root systems. Pull them before they flower and set seed, and you break the cycle entirely.
Perennial weeds — like dandelion, thistle, bindweed, and nutsedge — spread by both seed and root. Snap the stem without removing the root and it comes back, sometimes stronger. These need tools, not just hands.
Knowing which type you’re dealing with determines how much effort you’ll spend — and whether that effort actually pays off.
Tools You’ll Need to Remove Weeds from Mulch
The right gear before you start saves you time and saves your back. You don’t need much — but what you use matters.
For Small to Medium Infestations
- Garden gloves — thick enough to handle thorny weeds like thistle without getting pricked
- Hand trowel — good for loosening compacted soil around the base of shallow-rooted weeds
- Hori hori knife — a Japanese soil knife with a serrated edge on one side; ideal for digging out deep tap roots without disturbing nearby plants. One of the most underrated tools in lawn care.
- Weeding fork — great for prying up clumped or fibrous root systems cleanly
For Larger or Overgrown Mulch Beds
- Long-handled weeder — keeps you upright for large areas and spares your knees
- Garden hoe — effective for slicing annual weeds just below the soil line on a dry morning; cut weeds dry out fast and don’t re-root
- Flat rake — used after weeding to redistribute mulch, fill bare patches, and do the depth check
How to Remove Weeds from Mulch — Step by Step
Here’s where most guides fall short. They tell you what to do but not in what order. Sequence matters here — skip a step and you’re working harder than you need to.
Step 1 — Water the Area 24 Hours Before You Start
This single step changes everything. Soaking your mulch bed the day before loosens the soil around weed roots, letting you pull them out whole instead of snapping them at the stem and leaving the root behind.
The Old Farmer’s Almanac specifically recommends pulling weeds after rainfall because moist soil releases roots far more cleanly than dry, compacted ground. If rain is coming, plan your weeding session for the morning after.
Step 2 — Pull Annual Weeds by Hand (Grip Low, Pull Slow)
For annual weeds with shallow roots, hand-pulling remains the most effective and immediate method. But technique matters more than strength.
Grip the weed as close to the soil line as possible — not midway up the stem. Apply slow, steady upward pressure, rocking gently side to side before pulling. A fast yank almost always snaps the stem. Slow and deliberate gets the whole root out.
Drop pulled weeds into a bucket immediately. Don’t pile them on the mulch — moist weeds can re-root if left lying on the surface.
Step 3 — Use a Tool for Tap-Root Perennial Weeds
Dandelions, thistles, and bindweed have deep tap roots that can reach 6 to 12 inches into the soil. Pulling by hand won’t get them out in one piece — and leaving even a fragment of root means it grows back.
Use your hori hori knife or weeding fork to dig alongside the root — at least 4 to 5 inches down — then lever upward from below while applying steady upward pressure from above. You want the full root in your hand when it comes out.
Step 4 — Dispose of Weeds the Correct Way
Here’s a mistake a lot of people make: tossing pulled weeds into the compost pile.
If any of those weeds have already flowered or produced seed heads, they can survive the composting process and end up right back in your garden the following season. Bag any weed that has flowered or seeded and put it in the trash — not the compost. Non-seeding weeds without flowers are fine for composting.
Step 5 — Rake, Fluff, and Replenish Your Mulch
Once weeding is done, don’t just walk away. Use your rake to redistribute mulch over bare spots exposed during pulling.
Then do the finger test: push your finger straight down into the mulch. If you hit soil before reaching 2 inches of depth, you need to top up. According to Preen’s mulching guidelines, fresh mulch can go on top of existing mulch — just loosen and rake the existing layer first to prevent crusting and maintain proper drainage.
Should You Use Weed Killer in Mulch Beds?
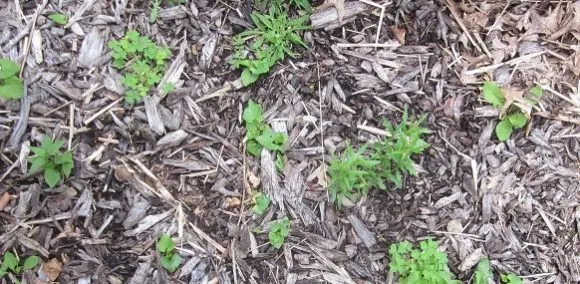
Hand-pulling works well for most situations. But if you’re dealing with a large infestation, persistent perennial weeds, or limited time, herbicides become part of the picture. Here’s how to use them safely.
Pre-Emergent Herbicides — Stop Weeds Before They Germinate
Pre-emergent herbicides create a chemical barrier at the soil surface that prevents weed seeds from germinating. They don’t kill weeds that are already growing — they stop new ones from sprouting.
Apply in early spring, before soil temperatures reach 55°F — which is when most annual weed seeds begin to activate. Products like Preen Garden Weed Preventer are commonly used in mulch beds.
Critical rule: Do not rake, hoe, or disturb the soil after applying a pre-emergent. Breaking that surface barrier makes the product ineffective. These treatments typically wear off within 5 to 6 months and require reapplication. They also only stop annual weeds — perennial weeds like nutsedge require a different approach.
Post-Emergent Herbicides — Targeting Weeds Already Growing
For weeds already actively growing, products containing glyphosate (the active ingredient in Roundup) are widely used. Here’s the important warning: glyphosate is non-selective, meaning it kills any plant it contacts — including your ornamental flowers, shrubs, and perennials.
If you must use it near other plants, apply it directly onto individual weed leaves using a small paintbrush rather than a sprayer. Alternatively, cover nearby plants with a cardboard box before spraying, and leave the box in place until the treated weed leaves have dried completely.
Natural Options — Vinegar, Boiling Water, Cardboard
Vinegar is popular as a natural weed killer, but it’s important to understand what it actually does. It burns and kills the leaves — it does not kill the root. That means it works on young, newly sprouted annual weeds with shallow roots, but it will not stop a dandelion or thistle from coming back from its deep taproot.
For a highly effective natural approach over a large area, try the cardboard-and-mulch method: remove tape from cardboard boxes, lay sheets flat over bare soil with overlapping edges, wet them down, and cover with 3 to 4 inches of fresh mulch. This smothers existing weeds by cutting off all light and air, while the cardboard biodegrades naturally into the soil over the following months. This method is especially well-suited for resetting overgrown beds or establishing new planting areas.
How to Keep Weeds from Coming Back in Your Mulch
Removal handles today’s problem. Prevention handles next season’s.
Maintain 2–3 Inches of Mulch Depth Year-Round
This is the single most impactful thing you can do. A consistent depth of 2 to 3 inches keeps sunlight from reaching the soil and creates conditions where seeds landing on top of the mulch struggle to establish. Check your depth twice a year — once in spring and once in late summer — and top up any areas that have thinned below 2 inches.
For most garden beds, a double or triple shredded hardwood mulch performs best because it settles tightly and creates a more effective light barrier than coarser materials like pine nuggets or straw. Coarser mulches leave more gaps for seeds to slip through.
Lay Landscape Fabric or Cardboard Underneath
When creating a new mulch bed or completely resetting an existing one, landscape fabric laid beneath your mulch layer adds a physical weed barrier that can remain effective for 2 to 5 years depending on the quality of material used. It allows water and air into the soil while physically blocking weed roots from pushing through.
A few things worth knowing:
- Landscape fabric works best under mulch in permanent beds around trees, shrubs, and ornamental plantings
- In vegetable beds, skip the fabric — you need to turn and amend the soil regularly
- Free alternative: overlapping sheets of plain cardboard (tape removed) achieve a similar effect and biodegrade naturally within one season
Weed in Season — Spring and Early Summer Are Your Most Important Windows
Timing matters more than frequency. Weeds that are allowed to flower and drop seeds create the next season’s problem — one seeding weed can scatter hundreds of seeds into your mulch bed.
Schedule a focused weeding session in early April (before soil temperatures rise and seeds activate) and again in late June (to catch anything that got established in spring). Outside of those windows, a quick walkthrough every two weeks is usually enough to stay ahead of stragglers before they can seed.
Frequently Asked Questions About Removing Weeds from Mulch
How do I remove weeds from mulch without pulling them by hand?
You have two practical options. First, apply a post-emergent herbicide carefully using a paintbrush directly onto individual weed leaves — avoiding any contact with nearby ornamental plants. Second, use the cardboard-and-mulch smothering method for larger areas: lay overlapping cardboard over the bed, wet it down, and cover with 3 to 4 inches of fresh mulch to cut off light and kill existing weeds over several weeks.
What kills weeds in mulch without harming my plants?
The safest approach is targeted application — either a paintbrush-applied glyphosate product on individual weeds, or a pre-emergent herbicide (like Preen) applied to the mulch surface in spring before new weeds sprout. For a natural option, horticultural vinegar at 20% acidity is more effective than household vinegar on young annual weeds, but keep it off plant foliage and roots.
How often should I weed my mulch beds?
For most homeowners maintaining proper mulch depth, two dedicated sessions per year — early spring and early summer — combined with a quick monthly check is sufficient. If weeds are appearing frequently and aggressively, the root cause is almost always mulch that’s too thin, too old, or both.
Does vinegar actually kill weeds in mulch?
Partially. Standard household white vinegar (5% acidity) burns the above-ground parts of a weed but rarely kills the root system. Perennial weeds will regrow from the root even after the leaves die off. For better results, use horticultural vinegar (20–30% acidity), applied on a dry, sunny day for maximum leaf contact. Even so, it’s most effective on young annual weeds — not established perennials.
Should I remove old mulch before adding new mulch?
Not always. You can layer fresh mulch on top of existing mulch, provided you loosen and rake the old layer first so it doesn’t form a water-resistant crust. If the existing mulch is heavily compacted, matted together, or showing signs of fungal growth (like white mold threads called mycelium), remove and replace it entirely before laying fresh material.
The Bottom Line
Weeds in mulch are frustrating — but they’re manageable when you know what’s actually going on.
Here’s what to carry with you from this guide:
- Water your beds 24 hours before pulling — wet soil releases roots cleanly
- Use your hands for annual weeds; use tools for tap-root perennials
- Bag any weed that has flowered or seeded — never compost them
- Replenish mulch to 2–3 inches after every weeding session
- Spring is your most important window — pull before weeds seed and the problem multiplies
Stay ahead of the growth cycle, keep your mulch at the right depth, and your beds will stay clean with far less effort than you’re probably spending right now..
References & Sources
- Texas A&M AgriLife Extension — How to Manage Garden Weeds with Mulch
- Gardening Know How — Why Are Weeds Coming Up in Mulch
- The Old Farmer’s Almanac — Natural Ways to Kill Weeds
- University of Minnesota Extension — Perennial Weeds: Identification and Control
- Ask Extension — How to Best Control Weeds Under Mulch
- Preen — Mulching Do’s and Don’ts
- US EPA — Glyphosate
- US EPA — Composting at Home
- Home Depot — How to Prevent Weeds
- Purdue Extension — Mulch Fungal Issues / Mycelium
About Author
Khalid Fazal is a seasoned lawn care specialist and horticultural researcher with over 15 years of hands-on experience transforming challenging landscapes into lush, resilient green spaces. His journey didn’t start in a lab, but in a backyard full of stubborn, cracked clay that “experts” said would never grow a healthy blade of grass. Refusing to accept a yard full of dust, Khalid spent years experimenting with organic soil restoration and precise mulching—eventually turning that wasteland into a neighborhood showpiece on a shoestring budget.
From mastering core aeration techniques to optimizing soil pH for specialized turf varieties, Khalid’s approach combines old-school grit with modern agronomic science. He founded Gen Lawn to provide homeowners with honest, research-backed advice that prioritizes long-term soil health over quick-fix chemical solutions. When he isn’t analyzing soil profiles, he’s developing precision tools to help others achieve professional results without the professional price tag.

Lawn Winterizer: When to Apply by Grass & Region [2026]
Table of Contents Home / By Khalid Fazal | Updated:...
Read More
Spring Lawn Care: What to Do and When in Every US Region
Table of Contents Home / By Khalid Fazal | Updated:...
Read More
Lawn Maintenance Checklist by Season and Grass Type (2026)
Table of Contents Home / By Khalid Fazal | Updated:...
Read More
Liquid Fertilizer vs Granular Fertilizer: Which Wins?
Table of Contents Home / By Khalid Fazal | Updated:...
Read More