The Best Mulch for Arborvitae: Types, Depth, Timing, and the Mistakes That Kill Trees
Arborvitae are one of the most popular privacy trees across the United States. They are low-maintenance, fast-growing, and stay green all year. But here is the problem: thousands of homeowners are slowly killing their arborvitae with one simple mistake, and most of them do not even realize it.
Some skip mulching altogether. Others pile mulch so high around the trunk that they create what arborists call a “mulch volcano.” Both choices lead to the same result: weak, stressed, browning trees that die years before their time.
Quick Answer: The best mulch for arborvitae is shredded bark, wood chips, or pine needles applied 2 to 4 inches deep in a wide ring, with 4 to 6 inches of bare soil left around the base of the trunk.
Why Arborvitae Need Mulch (More Than You Think)
Mulching is not just about aesthetics. For arborvitae, it is one of the most impactful things you can do for the long-term health of the tree.
Moisture Retention
Arborvitae (Thuja occidentalis) have shallow root systems that dry out faster than deeper-rooted trees. Mulch acts as a barrier between the soil and the sun, and research from UC Davis shows that a proper mulch layer reduces soil moisture evaporation by approximately 50 percent. That is a significant difference, especially during hot, dry summers in the US.
Without mulch, you are watering more often and still losing the battle against soil dryness.
Root Temperature Protection
Arborvitae roots are sensitive to extreme temperature swings. In summer, bare soil can overheat and stress the shallow feeder roots. In winter, unprotected roots go through repeated freeze-thaw cycles that heave the soil and damage root tissue. Mulch insulates against both extremes, keeping the root zone at a stable temperature year-round.
Weed Control
Weeds are silent competitors. They pull moisture and nutrients straight from the soil your arborvitae depend on. A proper mulch layer blocks sunlight from reaching weed seeds and prevents most of them from germinating in the first place.
Long-Term Soil Health
Here is a benefit most people overlook: as organic mulch breaks down over time, it feeds the soil microbiome. Healthy soil biology improves water infiltration, loosens compacted soil, and makes nutrients more available to arborvitae roots. It is a compounding benefit that keeps giving long after you first apply it.
One more data point worth knowing: properly mulched Green Giant arborvitae can grow 3 to 4 feet per year, making mulch one of the highest-return investments in tree care.
Best Types of Mulch for Arborvitae
Not all mulch is equal. Here is a breakdown of the best options and why each one works.
Shredded Bark Mulch
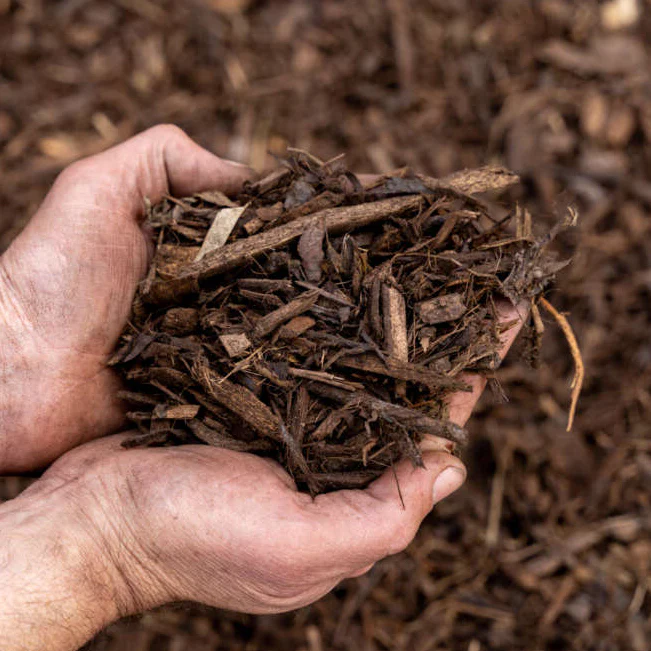
Shredded bark is the top choice for most homeowners and landscapers. It decomposes slowly (lasting 2 to 3 years), is widely available at any home improvement or garden center across the US, and creates a clean, finished look around arborvitae beds. It holds moisture well and does not compact as quickly as finer materials.
Wood Chips (Arborist Chips)
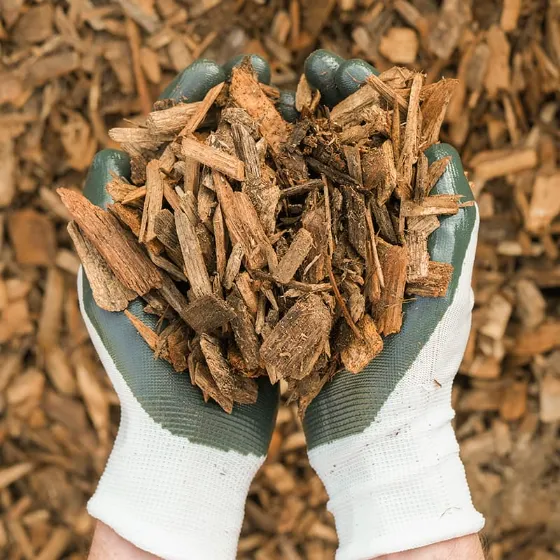
Wood chips are excellent for large plantings or rows of arborvitae used as privacy screens. They improve soil aeration as they break down. One concern homeowners often raise is nitrogen depletion, but a Clemson University study found that surface-applied wood chips do not deplete nitrogen in the soil. The only issue arises if chips are mixed directly into the soil, not spread on top.
Cedar Mulch
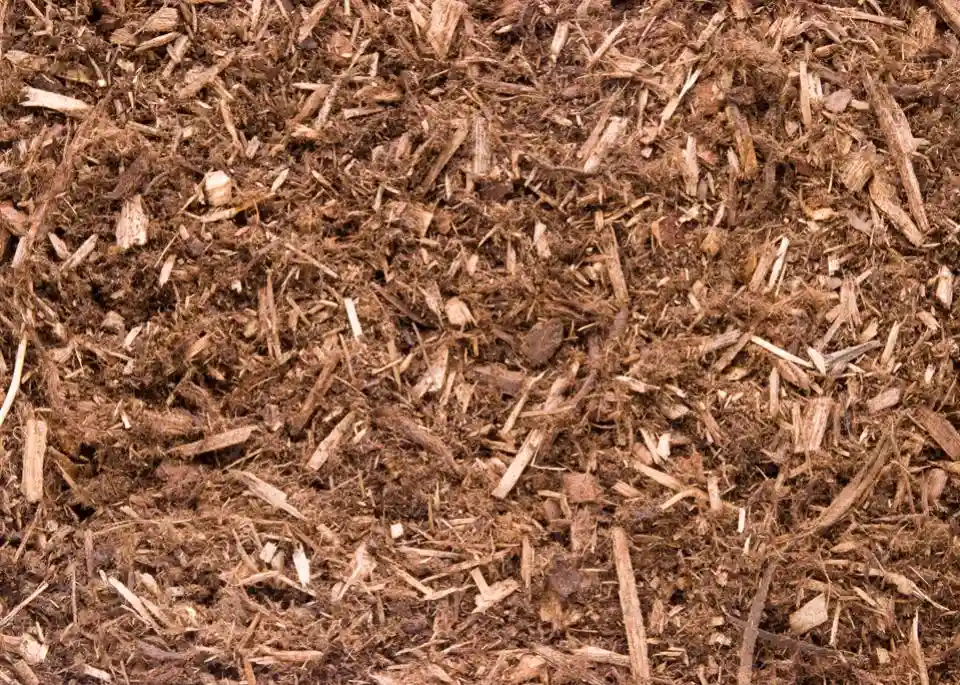
Cedar mulch contains natural oils that help repel insects and pests, making it a smart choice for arborvitae. The University of Maryland Extension notes that cedar is an excellent long-lasting mulch for evergreens like arborvitae, though it decomposes more slowly than other organic options. Do not be put off by its slow breakdown rate as that just means you top it up less often.
Pine Bark and Pine Needles
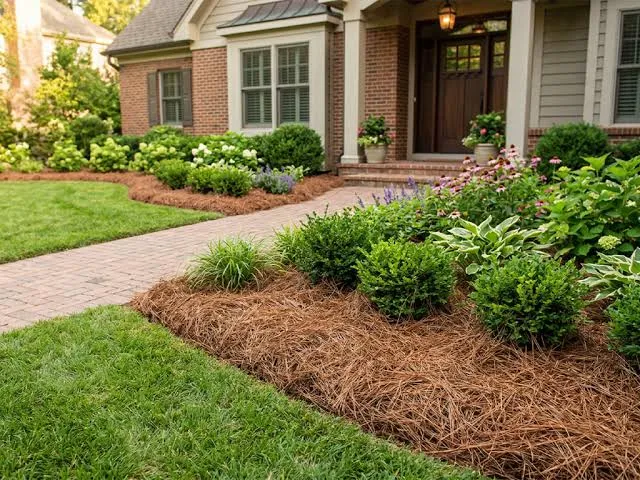
Pine bark mulch and pine straw both decompose slowly and create a soft, natural surface. They slightly acidify the soil over time, which suits arborvitae well since these trees prefer a neutral to slightly acidic soil pH range of 6.0 to 8.0. Both are ideal for cooler or more humid US regions where mulch tends to break down faster.
Shredded Leaves
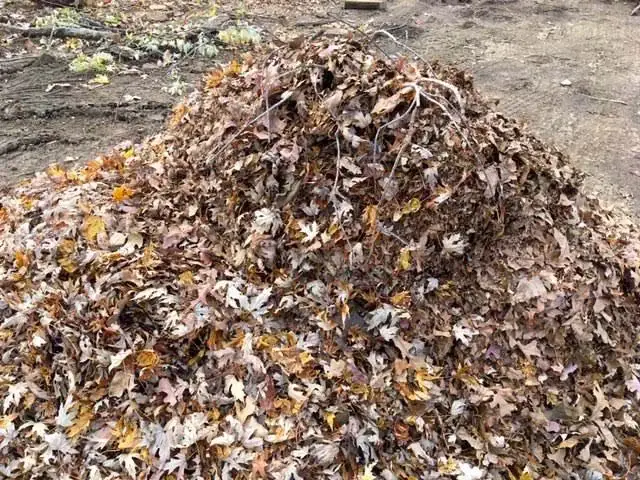
If you want a budget-friendly DIY option, shredded leaves work well for arborvitae. They are especially useful in fall when leaves are readily available. The tradeoff is that shredded leaves decompose faster, so you will need to top up more frequently, sometimes twice a year.
Mulch Comparison Chart
| Mulch Type | Ideal Depth | Lifespan | Best For | Cost |
|---|---|---|---|---|
| Shredded Bark | 2 to 4 inches | 2 to 3 years | All climates, clean look | $ |
| Wood Chips | 3 to 4 inches | 2 to 3 years | Large plantings, rows | $ |
| Cedar Mulch | 2 to 3 inches | 2 to 4 years | Pest-prone areas | $$ |
| Pine Straw | 2 to 3 inches | 1 to 2 years | Cooler/humid regions | $ |
| Shredded Leaves | 2 to 3 inches | 6 to 12 months | Fall mulching, DIY | Free |
Mulch to Avoid Around Arborvitae
Choosing the wrong mulch does more damage than skipping it altogether.
Rubber Mulch
Rubber mulch offers zero organic benefit. It contributes no nutrients, does not improve soil biology, and can leach chemicals harmful to soil microbes over time. It also traps heat around the root zone, which is the opposite of what arborvitae need.
Rocks and Gravel
Rocks look tidy but are one of the worst choices for living trees. The Sacramento Tree Foundation ranks rock beds as the least beneficial mulch for living soil systems because they trap and radiate heat while accelerating moisture loss. Your arborvitae will work harder to survive rather than thrive.
Dyed Mulch
Many dyed mulches are made from processed or treated wood and may contain metal-based colorants that harm beneficial soil microbes. If you want a specific color in your landscaping, opt for naturally colored bark varieties instead.
Thick Layers of Fresh Grass Clippings
Fresh grass clippings applied in thick layers mat together when wet, creating a dense anaerobic barrier that suffocates roots and promotes fungal mold growth at the soil surface. If you want to use grass clippings, apply no more than half an inch at a time and let it dry fully before adding another layer.
How to Apply Mulch Around Arborvitae the Right Way
Getting the type of mulch right is only half the battle. How you apply it matters just as much.
Step 1: Remove Weeds First
Pull or hoe any weeds growing inside the mulch area before you begin. Mulching over active weeds simply buries the problem temporarily.
Step 2: Apply the Right Depth
For coarse mulches like bark and wood chips, aim for 2 to 4 inches deep. For finer materials like pine needles or compost, keep it at 1 to 3 inches. Never go above 4 inches total, as overly thick mulch restricts the oxygen exchange that roots depend on.
Step 3: Follow the Donut Rule
This is the most important step. Think of your mulch ring as a donut: the mulch is the ring and bare soil is the hole in the center. Keep 4 to 6 inches of visible bare soil around the base of the trunk. For a single arborvitae, extend the mulch ring at least 2 to 3 feet outward in every direction. Ideally, push it out to the drip line, which is the outer edge of the tree canopy.
Step 4: Water After Applying
Once the mulch is spread evenly, water it deeply to help it settle into place. Check the next day for any low spots and top them up to maintain even coverage. Avoid walking or compacting the soil near the trunk.
The Volcano Mulching Problem You Need to Know About
Here is the truth: mulch volcanoes are one of the most widespread landscaping mistakes in America, and they are quietly killing trees in yards everywhere.
A mulch volcano is when mulch is piled high against the trunk in a cone shape. It might look intentional or even professional, but Dr. Eric North, urban forestry program manager at the Arbor Day Foundation and ISA Certified Arborist, warns that it causes serious long-term damage. When mulch stays in constant contact with the bark, it traps moisture, causes crown rot, and creates a habitat for insects and fungal disease. Over time, secondary roots grow up into the mulch layer instead of down into the ground, and as the mulch degrades, those roots become exposed and vulnerable.
Penn State Extension has been warning about this practice for decades. The fix is simple: pull the mulch back until you can see the root flare at the base of the trunk and leave that area exposed.
When to Mulch Arborvitae: Best Timing by Season
Timing your mulching correctly makes a real difference in how well it protects your trees.
Spring: The Best Time to Mulch
Early spring is the ideal time to apply or refresh mulch. Once the ground thaws and before summer heat arrives, a fresh layer locks in soil moisture and gives your arborvitae the best conditions for peak growing season. Spring is also the time to check how thick your existing mulch is. If it has dropped below 2 inches, top it up.
Fall: Before the First Freeze
Applying mulch in fall, before the first hard frost, insulates roots through winter. In cold-climate zones (USDA Zones 3 to 5), go slightly thicker at 3 to 4 inches for extra root protection. This prevents the freeze-thaw heaving that damages shallow root systems. Glover Nursery recommends refreshing mulch each fall as a standard part of arborvitae care.
New Plantings: Mulch Right Away
Newly planted arborvitae are the most vulnerable to moisture loss and temperature stress. Mulch them immediately after planting, no matter what season it is. The 2 to 4 inch ring you create at planting time is one of the most important steps in ensuring the tree establishes successfully.
How Often to Refresh Mulch
For shredded bark and wood chips, top up by 1 inch each year and do a full replacement every 1 to 2 years. For lighter mulches like pine straw or shredded leaves, plan to refresh twice a year. One simple check: if you press a finger through the mulch and it is less than 2 inches deep, it is time to add more. If it smells sour like vinegar, that signals anaerobic decomposition and the mulch should be raked out and replaced entirely.
Frequently Asked Questions About Mulch for Arborvitae
What is the best mulch for arborvitae?
The best mulch for arborvitae is shredded bark, wood chips, or cedar mulch. All three are organic, decompose slowly, and provide moisture retention, root insulation, and weed suppression without introducing chemicals that could harm the tree or soil.
How deep should mulch be around arborvitae?
Apply 2 to 4 inches of mulch for coarse materials or 1 to 3 inches for finer options like pine needles. Never exceed 4 inches, as overly thick mulch blocks oxygen from reaching the roots and can cause more harm than no mulch at all.
Can I use cedar mulch for arborvitae?
Yes. Cedar mulch is an excellent choice for arborvitae. According to the University of Maryland Extension, cedar is a long-lasting, pest-repelling mulch that works especially well for evergreen trees like arborvitae.
How often should I replace mulch around arborvitae?
For bark mulch, top up annually and fully replace every 1 to 2 years. For lighter organic mulches like shredded leaves or pine straw, plan to refresh every 6 to 12 months. Always check depth regularly as a simple 2-inch test guides your timing better than any fixed schedule.
Why is volcano mulching bad for arborvitae?
Volcano mulching traps moisture against the bark, creating ideal conditions for crown rot, pest infestation, and fungal disease. It also causes roots to grow upward into the mulch instead of downward into the ground, weakening the tree structurally over time. The Arbor Day Foundation calls it one of the most damaging but preventable tree care mistakes.
Wrapping It Up
Getting your mulch right is one of the simplest and highest-impact things you can do for your arborvitae. Here is what to remember:
- Choose organic: Shredded bark, wood chips, cedar, or pine needles all work well. Avoid rubber mulch, rocks, and dyed mulch.
- Depth matters: 2 to 4 inches deep, never more than 4 inches total.
- Leave the trunk clear: Keep 4 to 6 inches of bare soil around the base. Donut shape, not a volcano.
- Time it right: Mulch in spring before summer heat and in fall before the first frost.
- Refresh annually: Top up each spring and watch for signs of thinning, souring, or compaction.
References and Further Reading
- UC Davis: Mulch Benefits and Moisture Retention
- Penn State Extension: Mulch Volcanoes Are Erupting Everywhere
- Arbor Day Foundation: Proper Tree Mulching
- University of Maryland Extension: Mulching Trees and Shrubs
- Sacramento Tree Foundation: Mulch for Trees
- USDA Plant Hardiness Zone Map
- Glover Nursery: Arborvitae Fall Care Guide
About Author
Khalid Fazal is a seasoned lawn care specialist and horticultural researcher with over 15 years of hands-on experience transforming challenging landscapes into lush, resilient green spaces. His journey didn’t start in a lab, but in a backyard full of stubborn, cracked clay that “experts” said would never grow a healthy blade of grass. Refusing to accept a yard full of dust, Khalid spent years experimenting with organic soil restoration and precise mulching, eventually turning that wasteland into a neighborhood showpiece on a shoestring budget.
From mastering core aeration techniques to optimizing soil pH for specialized turf varieties, Khalid’s approach combines old-school grit with modern agronomic science. He founded Gen Lawn to provide homeowners with honest, research-backed advice that prioritizes long-term soil health over quick-fix chemical solutions. When he isn’t analyzing soil profiles, he’s developing precision tools to help others achieve professional results without the professional price tag.

Lawn Winterizer: When to Apply by Grass & Region [2026]
Table of Contents Home / By Khalid Fazal | Updated:...
Read More
Spring Lawn Care: What to Do and When in Every US Region
Table of Contents Home / By Khalid Fazal | Updated:...
Read More
Lawn Maintenance Checklist by Season and Grass Type (2026)
Table of Contents Home / By Khalid Fazal | Updated:...
Read More
Liquid Fertilizer vs Granular Fertilizer: Which Wins?
Table of Contents Home / By Khalid Fazal | Updated:...
Read More