Should I Remove Old Mulch? Here’s the Honest Answer (With a Simple Test)
You are standing in your yard, raking tools in hand, staring at last year’s gray, matted mulch. Spring is here. The beds look tired. And the big question is sitting right in front of you: do you rip all of this out and start fresh, or just pile new stuff on top?
Here is the problem. Get this wrong and you either waste $200 to $400 on unnecessary removal labor, or you quietly suffocate your plants all season under a 5-inch brick of compacted, oxygen-blocking mulch. Neither outcome is good.
Here is the honest answer: in most cases, you do not need to remove old mulch before adding new. But three specific conditions flip that answer completely. This guide walks you through a simple 4-step test so you know exactly what to do before you buy a single bag of new mulch.
Should I Remove Old Mulch or Just Add New On Top?
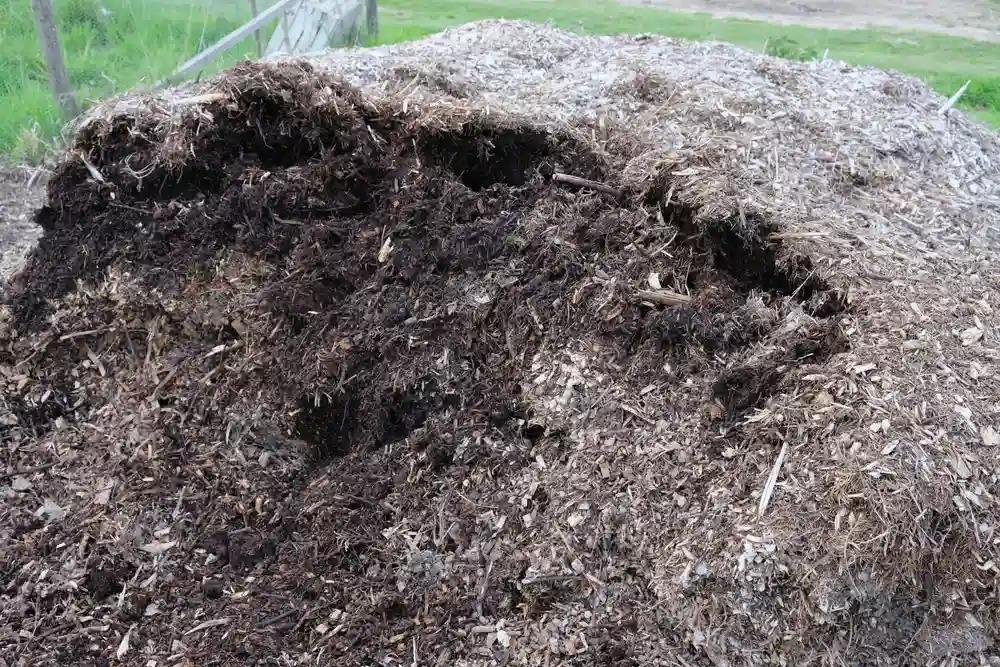
The short answer is: leave it, unless one of the red flags below applies to your bed.
Organic mulch breaks down naturally over time. As it decomposes, it releases nitrogen, phosphorus, potassium, and trace minerals back into your soil. Pulling out healthy, decomposing mulch every spring is the gardening equivalent of throwing away free fertilizer.
That said, not all old mulch is created equal. The condition and depth of what is already there determines your next move. Use this quick reference table before you do anything else.
| Condition of Old Mulch | What to Do |
|---|---|
| Still 2 to 3 inches thick and loose | Skip removal. Rake and top-dress with 1 inch of fresh mulch |
| Total depth has built up past 4 inches | Remove the bottom half before adding any new material |
| Water beads off the surface instead of soaking in | Break it up or remove it. The layer has gone hydrophobic |
| Signs of mold, artillery fungus, or active pests | Remove completely and bag it. Do not compost |
| Fully broken down into dark, crumbly soil-like material | Leave it. It is now organic matter benefiting your soil |
| Switching to a different mulch color or type | Remove the old layer for a clean, uniform look |
The 4-Step Test: How to Know If Your Old Mulch Needs to Come Out
Before you touch a shovel, spend five minutes on these checks. They cost nothing and will tell you exactly what approach your beds actually need.
Step 1: Check the Depth
Grab a pencil, a screwdriver, or a ruler and push it straight down through the mulch layer until you feel firm soil resistance. Do this in three or four spots across the bed.
- Under 2 inches deep: Add new mulch on top. No removal needed.
- Between 2 and 3 inches: A light 1-inch top-dress restores color and protection.
- 4 inches or more: Remove the lower, most decomposed material first. Mulch that deep blocks oxygen and water from reaching plant roots, and can create anaerobic conditions in the lower layers that actually harm soil health.
One expert warning worth knowing: when mulch consistently sits above 5 inches, trees can develop what is called adventitious rooting, where roots grow upward into the mulch layer instead of downward into the ground. This starves the primary root system of oxygen and makes plants far more vulnerable during drought and winter freezes.
Step 2: Do the Water Test
This is the fastest way to check if your old mulch is still doing its job.
Pour a small cup of water directly onto the mulch surface. Watch what happens for 10 seconds.
- Water soaks in within a few seconds: The mulch is still permeable and functional. You are good to top-dress.
- Water beads up and runs off: The layer has gone hydrophobic. This happens most often with wood-based mulch in hot, dry climates. A hydrophobic mulch layer defeats the entire purpose of mulching because water never reaches your plant roots.
If the water beads, rake the existing layer aggressively to break up the mat before adding anything new on top.
Step 3: Look for Disease, Mold, or Pests
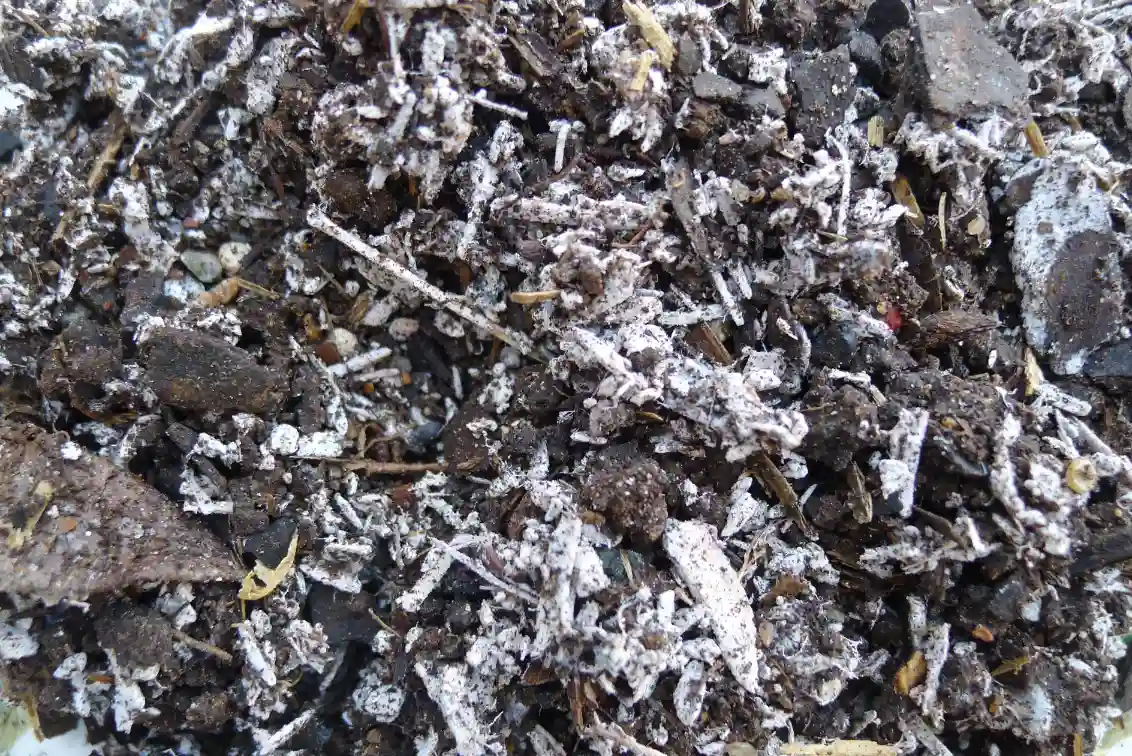
Flip back a section of old mulch and check the underside. Here is what to look for.
- Artillery fungus: Tiny black tar-like dots, often appearing on nearby siding, fences, or car surfaces. This requires full removal and bagging. Artillery fungus spores travel up to 20 feet and permanently stain surfaces if left untreated.
- Slime mold or white fuzzy patches: These are usually harmless surface fungi. Rake to expose them to sunlight and they typically resolve on their own.
- Sour or vinegar-like smell when you dig in: This signals sour mulch, which is mulch that fermented from being stored in an oxygen-depleted environment. It can damage or kill plants. Break up the mat, let it air out for 24 hours, and test again before covering plants.
- Visible ants, roaches, termites, or carpenter ants in large numbers: Remove and bag the affected mulch. Do not add a fresh layer on top as it will compound the pest habitat.
Step 4: Check Around Plant Stems and Tree Trunks
Even if the overall depth is fine, mulch piled against plant stems and tree bases is a serious problem.
This is called a mulch volcano, and it causes stem rot, bark disease, and creates a direct pest highway into your plants. Before adding any new mulch to any bed, pull existing material back so there is a 2 to 3 inch clear gap around every plant stem and tree trunk.
When Removing Old Mulch Is Worth the Extra Effort
Most of the time, you will not need to do a full removal. But these four situations are exceptions.
Your Bed Has Built Up Past 4 Inches From Years of Layering
This is the most common reason professional crews pull old mulch before refreshing. Homeowners who top-dress every spring without ever checking total depth can end up with 6 to 8 inches of accumulated material after just a few seasons. That depth blocks oxygen, blocks water, and can cause root and crown rot that looks like plant disease but is actually a soil environment problem.
The Mulch Has Become a Hydrophobic Mat
Wood-based mulch in sunny, hot conditions can develop a dense, compacted surface that repels water rather than absorbing it. Raking alone sometimes does not fix this. If the water test shows consistent beading across the bed, remove the layer and start fresh.
You See Artillery Fungus or Plant Disease
These problems do not go away with a fresh top layer. They require complete removal because the spores and pathogens live in the lower layers of mulch. Always bag diseased mulch for curbside yard waste pickup. Never add it to a compost pile because doing so can spread the disease to other areas of your yard.
You Are Redesigning the Bed or Switching Mulch Types
If you are removing plants, installing landscape fabric, or switching from wood chips to pine straw, start with a clean base. Mixing different mulch types creates an uneven, mottled look and can interfere with depth management going forward.
How to Remove Old Mulch the Right Way
If your assessment confirms removal is needed, here is the cleanest way to do it.
- Rake the top layer first. Pull back the fresher upper material and set it aside. It may still be usable as a top-dress in another bed.
- Check the bottom layer. If the lower material has fully broken down into dark, crumbly, soil-like material, do not bag it. Rake it lightly into the existing soil as a free organic amendment.
- Bag anything diseased or pest-infested. Never compost infected mulch. Place it in yard waste bags for curbside pickup.
- Lightly aerate the exposed soil. Use a garden fork to break up any surface compaction before applying new mulch.
- Apply fresh mulch to a depth of 2 to 3 inches, keeping a clear 2 to 3 inch gap around every stem and trunk.
What to do with healthy old mulch: Add it to a compost pile, till it directly into garden beds as a soil amendment, or spread it in wooded border areas of your yard.
Tools you will need: A garden rake, a pitchfork or mulch fork, heavy-duty yard waste bags, and a wheelbarrow for larger beds.
How Much New Mulch Do You Need After Removing the Old?
Use this simple formula: Length (ft) x Width (ft) x Desired Depth (inches), divided by 12 equals cubic feet. Divide by 27 to convert to cubic yards.
Here is a quick reference table to save you the math.
| Bed Size | 1-Inch Top-Dress | 2-Inch Fresh Layer | 3-Inch Full Refresh |
|---|---|---|---|
| 100 sq ft | 0.3 cu yd | 0.6 cu yd | 0.9 cu yd |
| 200 sq ft | 0.6 cu yd | 1.2 cu yd | 1.9 cu yd |
| 300 sq ft | 0.9 cu yd | 1.9 cu yd | 2.8 cu yd |
| 500 sq ft | 1.5 cu yd | 3.1 cu yd | 4.6 cu yd |
Pro tip: If you need more than 3 cubic yards, buying bulk mulch from a landscape supplier is significantly cheaper per yard than buying bagged mulch from a hardware store. For beds under 2 cubic yards, bagged is usually fine.
For a deeper look at mulch lifespan by type and how often you actually need to refresh different materials, see the Gen Lawn guide on how long mulch lasts.
Frequently Asked Questions About Removing Old Mulch
Should I remove old mulch before adding new mulch every single year?
No. Annual full removal is unnecessary and actually counterproductive for most beds. The standard approach is to check your total depth each spring, rake to break up any compaction, and top-dress with 1 inch of fresh material. Full removal is only needed when depth exceeds 4 inches, disease is present, or the bed is being fully renovated.
Is it OK to just put new mulch on top of old mulch?
Yes, as long as the total combined depth stays at or under 3 inches and the existing layer is not compacted, hydrophobic, or diseased. Always rake the old layer loose before adding the new one on top.
Can old mulch cause problems for my plants?
It can, if it builds up too deep or becomes compacted. Mulch that exceeds 4 inches can suffocate roots, create anaerobic soil conditions, and cause crown rot in shrubs and perennials. Mulch piled directly against plant stems and tree trunks causes bark decay and attracts pests regardless of depth.
How often should mulch be fully replaced vs. just refreshed?
For most organic mulches, a light top-dress annually and a full replacement every 2 to 3 years is the standard recommendation. Cedar and cypress mulch lasts longer (2 to 3 years before needing a refresh) because the natural oils in the wood slow down decomposition. Dyed mulch fades in 6 to 12 months but may still be structurally functional beyond that point.
What happens if you leave mulch too long without refreshing it?
Over time, mulch breaks down completely into humus, which is actually a good thing for soil health. The issue is that once it fully decomposes, it no longer suppresses weeds or retains moisture effectively. You will notice more weed growth pushing through, and the beds will look bare and faded. That is your signal to add a fresh layer, not necessarily remove what is there.
The Bottom Line on Removing Old Mulch
Most homeowners do not need to remove old mulch. They need to assess it.
Here is your fast-reference summary before you start any mulch project this season.
- Check the depth first. If total depth is under 3 inches, just rake and top-dress.
- Run the water test. Beading water means a hydrophobic layer that needs to be broken up or removed.
- Look for artillery fungus, disease, or heavy pest activity. These require full removal and bagging.
- Always clear a 2 to 3 inch gap around every plant stem and tree trunk before adding any new material.
- Removing healthy old mulch wastes money. A full removal and replacement for a 500 sq ft bed costs $250 to $700, compared to $50 to $300 for a simple top-dress.
When in doubt, spend five minutes on the 4-step test above before spending a dollar on new mulch.
Sources and Further Reading
- Mulching Trees and Shrubs, University of Maryland Extension
- Artillery Fungus in Mulch, Penn State Extension
- Sour Mulch, Clemson University Cooperative Extension
- Mulching Trees and Shrubs, University of Wisconsin Extension
- Using Organic Mulches in the Home Landscape, Penn State Extension
- Composting at Home, US Environmental Protection Agency
- How Long Does Mulch Last, Gen Lawn
About Author
Khalid Fazal is a seasoned lawn care specialist and horticultural researcher with over 15 years of hands-on experience transforming challenging landscapes into lush, resilient green spaces. His journey didn’t start in a lab, but in a backyard full of stubborn, cracked clay that “experts” said would never grow a healthy blade of grass. Refusing to accept a yard full of dust, Khalid spent years experimenting with organic soil restoration and precise mulching, eventually turning that wasteland into a neighborhood showpiece on a shoestring budget.
From mastering core aeration techniques to optimizing soil pH for specialized turf varieties, Khalid’s approach combines old-school grit with modern agronomic science. He founded Gen Lawn to provide homeowners with honest, research-backed advice that prioritizes long-term soil health over quick-fix chemical solutions. When he isn’t analyzing soil profiles, he’s developing precision tools to help others achieve professional results without the professional price tag.

Lawn Winterizer: When to Apply by Grass & Region [2026]
Table of Contents Home / By Khalid Fazal | Updated:...
Read More
Spring Lawn Care: What to Do and When in Every US Region
Table of Contents Home / By Khalid Fazal | Updated:...
Read More
Lawn Maintenance Checklist by Season and Grass Type (2026)
Table of Contents Home / By Khalid Fazal | Updated:...
Read More
Liquid Fertilizer vs Granular Fertilizer: Which Wins?
Table of Contents Home / By Khalid Fazal | Updated:...
Read More